Practical Procedures: Wounds, Vital Signs and Tests
MedicalHow to examine, clean and close a wound on board (strips, glue, staples, sutures), prevent infection and tetanus, take vital signs and run simple bedside tests (blood pressure, SpO2, blood glucose, urine dipstick), and keep the ship hygienic. These hands-on skills let you treat and monitor a casualty and give radio medical advice accurate figures.
Last reviewed 1 Nov 2026 · From a professional captain's years of study notes · Organised with AI and checked against current regulations · How we write
On this page (12)
Assessing a Wound
In short: know what caused the wound, then examine it with Look · Feel · Move. The findings decide whether you may close it on board.
Types of wound
- Incision · laceration · abrasion · puncture · penetration · contusion (bruise) · haematoma (collection of blood under the skin).
- Incised wound — made by a sharp object (knife, glass). Nerves and vessels are cut through, so it bleeds heavily.
- Laceration — a tear from blunt trauma (a fall against a cleat, a swinging block). Edges are bruised; nerves and vessels are often intact.
Approach and examination
- Start every casualty with DR BBCFS – ABCDE. Keep reassessing, even if the casualty looked well at first — they can deteriorate.
- A very large wound → check for circulation problems (blood loss, shock).
- Look: describe the wound — type, site, length, bleeding, direction (vertical or horizontal), depth. Is it dirty or infected? A crush injury? A fracture underneath? Foreign bodies? A tendon or joint involved?
- Feel: loss of sensation below the wound · loss of circulation below the wound · obvious foreign bodies.
- Move: can the casualty move the joint above and the joint below?
Record sensation, movement and distal circulation before AND after any closure — it proves you did not cause new damage.
Deciding to Close: Timing and Contraindications
In short: you may close a clean, simple wound on board within 12 hours. Anything complicated stays open and goes to radio medical advice.
The 12-hour window
- A wound can be sutured up to 12 h after the injury.
- After 12 h the edges have started to heal: the wound must be debrided (re-cut) before closing — not a job for the ship.
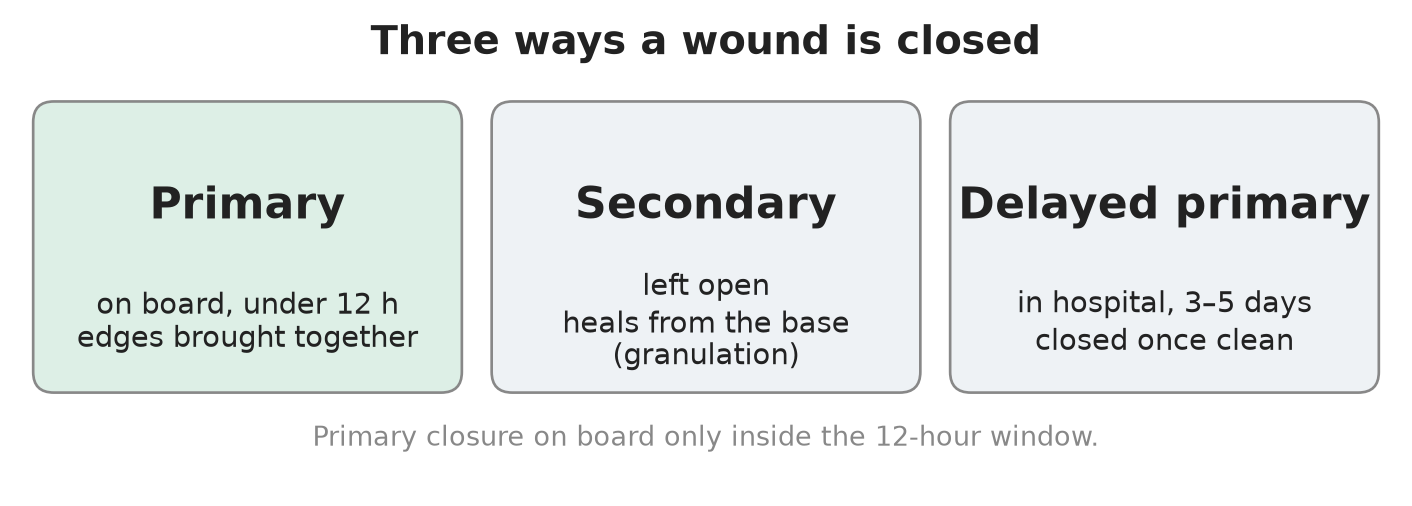
Three types of closure
| Type | Where and when | How it heals |
|---|---|---|
| Primary closure | On board, under 12 h after injury | Edges brought together surgically |
| Secondary closure | Left open | Heals naturally by granulation from the base |
| Delayed primary closure | In hospital, 3–5 days after injury | Closed once clean |
Not suitable for primary closure
- Stab wounds to the trunk or neck.
- Tendon, joint or nerve involvement.
- Crush injury.
- Large areas of dead (devitalised) tissue or skin loss.
- Heavily contaminated or infected wounds.
- Wounds older than 12 h.
- An underlying injury or a foreign body.
- A penetrating wound with the weapon still in place — leave it in.
- Human or animal bites — never close them primarily. Wash well, start antibiotics, and let a doctor close them later.
Cleaning and Preparing the Wound
In short: a good washout prevents more infections than any antibiotic. Use saline or a mild antiseptic — never anything that burns living tissue.
Kit
- Kidney dish · fine forceps (tweezers) · scissors · artery forceps / needle holder.
Preparing the skin
- If possible, shave the hair round the wound with a clean razor (boiled for 20 min).
- Clean with sterile 0.9% normal saline or Sch 5 antiseptic solution.
- Tap water is fine if the supply is reliable.
- Stock saline in small 10–20 ml bottles: once a bottle is opened it is no longer sterile.
Never use hydrogen peroxide or strong iodine solutions in a wound — they damage healthy cells and slow healing.
Products you may find in the medical chest
- Sterets Tisept sachets (25 ml) — chlorhexidine gluconate 0.015% + cetrimide 0.15%. Skin only, use undiluted, throw away what is left, not for injection, keep out of the eyes.
- Sodium chloride 0.9% (e.g. Versylene) — for irrigation only, not for injection.
- Betadine solution — 10% povidone-iodine. It is a strong iodine: not inside the wound; if you use it, dilute 50:50.
- Ask about antiseptic allergies before you use any of them.
Closure Methods and Suturing Technique
In short: pick the simplest method that holds the edges together. Strips and glue for small, low-tension cuts; staples or sutures for the rest.
The four methods
- Adhesive strips (Steri-Strips) — pull the edges together; quick, no anaesthetic.
- Tissue glue — dry the wound with sterile gauze, hold the edges together, run the glue along the top of the closed edges, hold for 30–60 s. Never put glue inside the wound.
- Skin staples — fast mechanical closure; you need a staple remover to take them out.
- Sutures — simple interrupted (the standard: one knot per stitch) or mattress (for deeper wounds, turns the edges outwards).
Suture size: the higher the number, the thinner the thread (4-0 is finer than 3-0). Joints and scalp are under high tension → use a thicker suture, and never strips or glue over a joint.
Suturing step by step
- Approach: DR BBCFS – ABCDE; examine the wound (Look · Feel · Move) and confirm it is fit for primary closure (under 12 h, not on the “not suitable” list).
- Record sensation, movement and distal circulation.
- Prepare the wound: shave if needed, clean with saline or Sch 5.
- Local anaesthetic: 1% lidocaine. Adult maximum about 20 ml of 1% — an unconfirmed figure, so check the dose in the Ship Captain’s Medical Guide. Use lidocaine without adrenaline. Aspirate before every injection. Inject from inside the wound edge, fanning out without pulling the needle fully out.
- Load the needle in the needle holder between the apex of its curve and two-thirds of the way from the tip end (one demonstration used Prolene 3-0). One description simply says “hold it at the lower third” — both put the grip well back from the point.
- Hold the skin with toothed dissecting forceps; hold the needle with the needle holder or Spencer Wells forceps.
- Place simple interrupted sutures, starting at the centre of the wound, then halve the gaps.
- Knots: first throw a double loop, then at least 3 throws, each in the opposite direction. Leave the tails long so the stitch is easy to remove.
- Re-check sensation, movement and distal circulation.
- Cover with a sterile dressing and bandage.
- Why interrupted, not continuous? If one knot fails, only one stitch is lost — not the whole closure.
- Gloves: clean non-sterile gloves are acceptable for simple suturing — studies show no extra infection. A needle-stick injury carries a hepatitis risk: handle sharps with care.
- Practice before you need it: suture pads, or a pig’s trotter, with a suture kit and skin stapler.
Infection, Tetanus and Aftercare
In short: clean well, give antibiotics only when the wound is high-risk, check tetanus cover, and inspect the wound every 2 days.
Antibiotics
- Most wounds do not need antibiotics. The best prevention is thorough cleaning and a good washout.
- Heavily contaminated wounds: leave them open and cover with wet sterile dressings.
- Antibiotics are indicated for the wounds on the “not suitable for primary closure” list:
- Co-amoxiclav 1 g twice a day for 7 days.
- Penicillin allergy: erythromycin 500 mg four times a day (QDS) for 7 days.
Tetanus
- A serious infection that can kill. It is not contagious and is fully preventable by vaccination.
- Signs: fever · high blood pressure · muscle spasms · lockjaw · sweating · difficulty swallowing.
- Vaccination: 5 doses in the first 18 years of life, then a booster every 10 years — advised for seafarers, who work among rust and oil-based products.
- Dirty wound → tetanus immunoglobulin AND vaccine.
- Clean wound → vaccine only if the last dose was more than 10 years ago.
Follow-up
- Suspected underlying injury, fracture, crush, foreign body or heavy contamination → radio medical advice.
- After primary closure: sterile dressing + bandage; check every 2 days — is it healing, any sign of infection? Clean with sterile water and change the dressing.
Vital Signs: Normal Values and Pulse Oximetry
In short: radio medical advice works from your numbers. Know the normal ranges and the traps of each device.
The kit
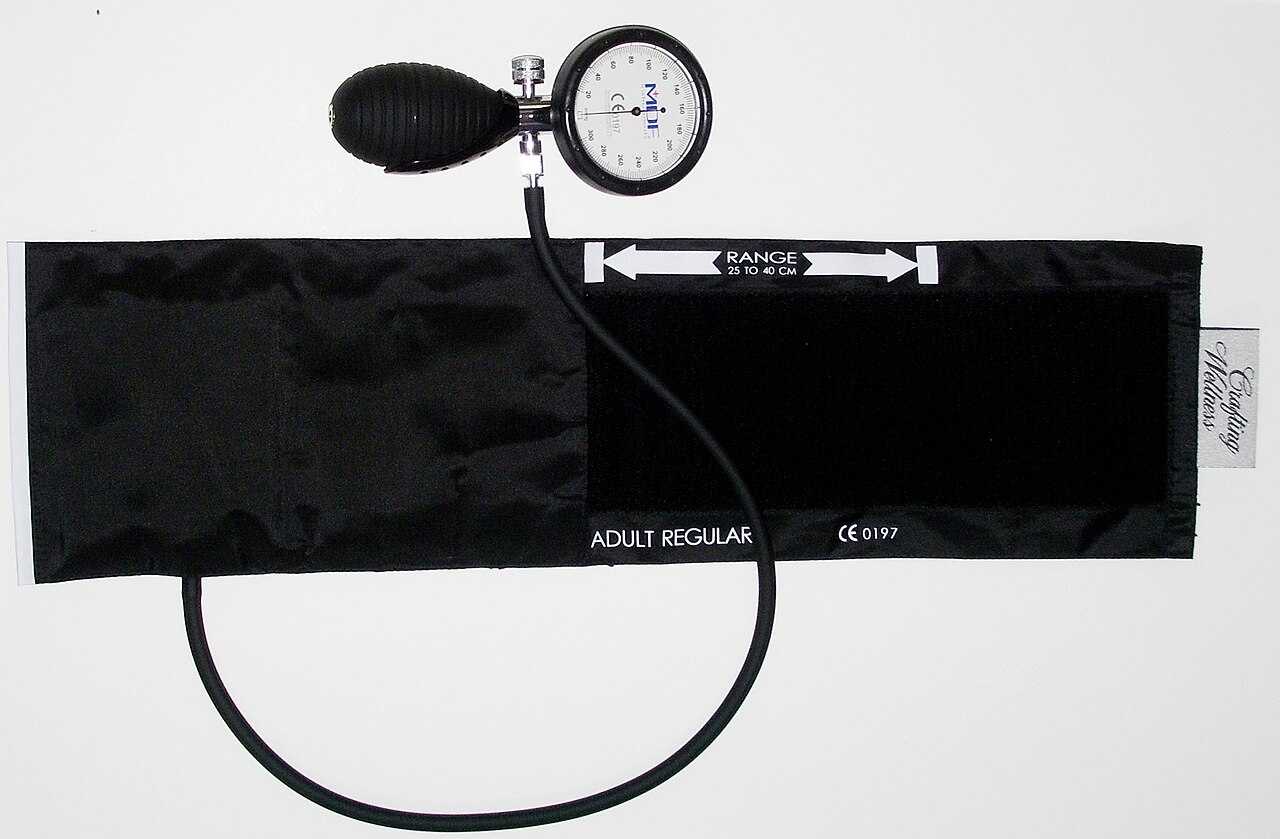
- Blood pressure: aneroid sphygmomanometer with adult cuffs, stethoscope; an automatic BP monitor (often with a WHO colour scale on the side).
- Temperature: digital thermometer.
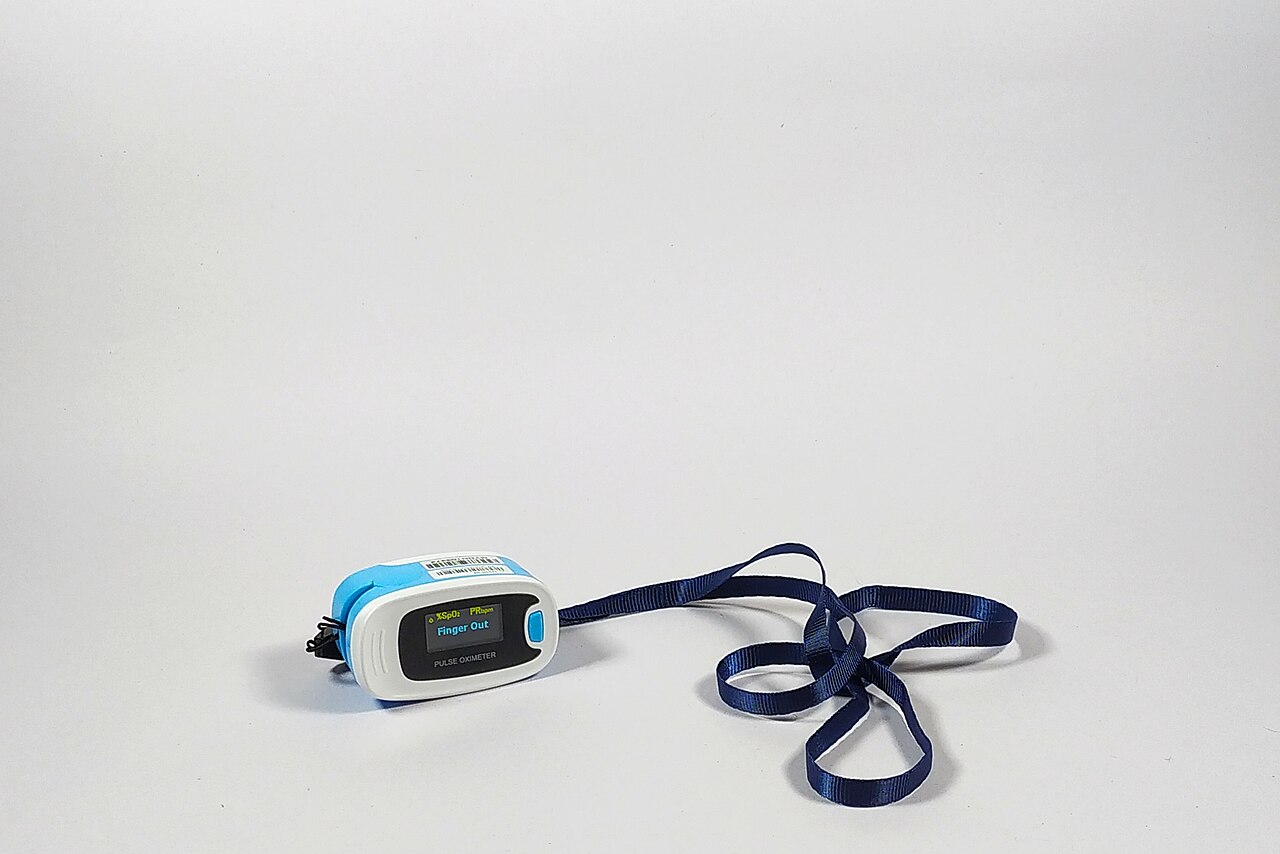
- Oxygen: finger-clip pulse oximeter — shows SpO2, pulse rate (PR) and perfusion index (PI).
- Tests: urine dipstick strips (e.g. Combur Test), sample tubes, glucometer with a lancing pen and sterile 30G lancets, gloves, sharps container.
Normal values
| Measurement | Normal | Notes |
|---|---|---|
| SpO2 | 95–100% | 88–95% can be acceptable in chronic lung disease |
| Blood glucose | about 70–140 mg/dL (≈ 3.9–7.8 mmol/L) | Low = hypoglycaemia; persistently high = refer / radio medical advice |
| Blood pressure | e.g. 125/77 mmHg with pulse 69 is a normal adult reading | Always the same arm |
Pulse oximeter traps
- Carbon monoxide poisoning gives a falsely normal SpO2 — the probe cannot tell CO from oxygen on haemoglobin. Treat the history, not the number.
- Low perfusion index (e.g. PI 0.4%) = weak signal from a cold or poorly perfused finger. The reading is less reliable: warm the hand, reposition the probe and retry.
- Example: one reading showed SpO2 98%, pulse 76; a second, on a poorly perfused finger, showed SpO2 93%, pulse 107, PI 0.4% — repeat before you act on it.
Measuring Blood Pressure by Hand
In short: cuff on the bare upper arm at heart level, stethoscope on the brachial artery, deflate slowly — first sound systolic, last sound diastolic.
Procedure
- Casualty seated and rested for 5 min, arm supported at heart level, cuff on a bare arm.
- Fit the right-size cuff about 2 cm above the elbow crease, with the hoses or arrow over the brachial artery.
- Feel the radial pulse; inflate until it disappears, then 20–30 mmHg more.
- Put the stethoscope on the brachial artery (inside of the elbow).
- Deflate slowly, about 2–3 mmHg per second.
- First sound = SYSTOLIC · sound disappears = DIASTOLIC.
- Record both values and the time. In doubt, let the arm rest 1–2 min and repeat.
Good practice
- Always use the same arm — left and right can differ by up to 20 mmHg.
- An aneroid gauge that has been dropped is out of calibration → replace it.
- In an emergency the BP cuff doubles as a tourniquet.
Bedside Tests: Blood Glucose and Urine Dipstick
In short: both tests are quick and cheap, but only reliable if you follow the steps and the timing exactly.
Blood glucose (finger prick)
- Gloves on. The casualty washes their hands in warm water — sugar on the skin gives a false high.
- Load a sterile lancet in the lancing pen; insert a test strip — the meter switches on.
- Milk the finger before disinfecting, then prick the side of the fingertip — less painful, better blood flow.
- Wipe away the first drop; use the second drop.
- Touch the drop to the tip of the strip and wait for the reading (mg/dL on many meters).
- Lancet into the sharps container; record value and time.
- Normal ≈ 70–140 mg/dL. Low = hypoglycaemia; persistently high = refer or get radio medical advice.
- Strips come in a sealed tube — keep it closed.
Urine dipstick
- Collect a fresh mid-stream sample in a clean container.
- Gloves on. Take out a strip without touching the test pads; close the tube at once — humidity spoils the strips.
- Dip all pads for 1–2 seconds.
- Drag the edge of the strip on the rim to remove excess urine.
- Hold it horizontal and wait the time printed on the tube — 30–120 s depending on the pad (many read at about 30 s).
- Compare each pad with the colour chart on that tube; record blood, protein, glucose, ketones, leucocytes, nitrites and so on.
| Result | Suggests |
|---|---|
| Nitrites + protein | Urinary infection |
| Ketones | Starvation (not eating) |
| Bilirubin | Liver problem |
Reading the strip too early or too late gives false results.
Hygiene and Infection Control on Board
In short: a ship is a closed community. Good food, water and pest hygiene stop one sick crew member from becoming a whole sick crew.
WHO five keys to safer food
- Prevent contamination — germs spread from people, pets and pests.
- Separate raw and cooked food — don’t let raw food touch cooked food.
- Cook thoroughly — the right time and temperature kill germs.
- Store food at the proper temperature.
- Use safe water and raw materials.
Hygiene-critical areas
- Galley: preparing, defrosting and refrigerating food; 20-second hand washing or alcohol gel.
- Water taken on board: a water softener prevents scale hardening the pipework.
- Bathrooms, toilets, laundry.
- Waste: MARPOL Annex IV (sewage) — black-water and grey-water tanks.
- Air conditioning: clean the filters. Ventilation: maintain and clean the vents.
- Working areas (wheelhouse, engine control room) and cargo spaces.
- Meat and fish cargo spoils fast — shellfish worst. Cold stores need an external temperature display.
- Livestock needs health certificates and port health checks from port to port — and certificates are not always honest.
Pests and the diseases they carry
| Pest | Risk |
|---|---|
| Cockroaches, mice | Food contamination — keep areas where food is stored, prepared or eaten clean |
| Mosquitoes | Malaria, dengue, yellow fever |
| Fleas | Plague and typhus |
| Lice | Typhus |
| Ticks | Spotted fever, Lyme disease |
| Dogs | Rabies |
| Rats | Rabies — fit rat guards on mooring lines; keep food areas and dead spaces clean; kill by trap, poison or fumigation |
| Birds (e.g. parrots) | Psittacosis |
| Bats | Coronavirus (bat → animal → human) |
Poisons and fumigation gases are poisonous to humans too. And the Q flag means “my ship is healthy, I request free pratique” — with an infectious disease on board you do NOT raise it.
⚡ Flashcards
Test yourself, one card at a timeQ1Incised wound or laceration: what is the difference, and why does it matter?
AnswerIncised = sharp object, severed nerves and vessels → bleeds a lot · Laceration = blunt trauma, bruised edges, nerves and vessels often intact.
Common trapTrap: a neat cut can still hide a cut tendon or nerve — always test below the wound.
Q2How do you examine a wound before you close it?
AnswerDR BBCFS – ABCDE first, then Look · Feel · Move: describe it, look for dirt, crush, fracture, foreign body, tendon or joint; feel sensation and circulation below; move the joint above and below.
Common trapTrap: check sensation, movement and distal circulation before AND after closing.
Q3How long do you have to close a wound on board, and what are the three types of closure?
Answer12 h. Primary = closed on board within 12 h · Secondary = left to heal by granulation · Delayed primary = closed in hospital after 3–5 days.
Common trapTrap: after 12 h the edges start healing — the wound must be re-cut (debrided) before closing.
Q4Which wounds must you NOT close on board?
AnswerStab wounds to trunk or neck · tendon, joint or nerve damage · crush · dead tissue or skin loss · heavily dirty or infected · over 12 h old · underlying injury or foreign body · weapon still in place.
Common trapTrap: human or animal bites — never close primarily; wash, antibiotics, a doctor closes later.
Q5What do you clean a wound with, and what must you never use?
AnswerSterile 0.9% saline or Sch 5 antiseptic; clean tap water if reliable. Strong Betadine → dilute 50:50, ask about allergies.
Common trapTrap: no hydrogen peroxide or strong iodine inside the wound — they kill healthy cells.
Q6Strips, glue, staples or stitches: which rules must you know?
AnswerGlue: hold the edges together first, glue on top only, hold 30–60 s. Suture size: higher number = thinner thread.
Common trapTrap: never strips or glue over a joint — high tension; joints and scalp need a thicker suture.
Q7What are the key points of suturing a simple wound?
Answer1% lidocaine without adrenaline, aspirate before each injection · simple interrupted stitches, start at the centre · knot: double first throw, at least 3 throws in alternate directions, long tails.
Common trapTrap: don’t run one continuous stitch — if one knot fails, the whole closure opens.
Q8Does every wound need antibiotics? And tetanus cover?
AnswerNo — thorough cleaning is the best prevention. Antibiotics for unsuitable wounds: co-amoxiclav 1 g twice daily, 7 days (penicillin allergy: erythromycin 500 mg four times daily, 7 days). Dirty wound → tetanus immunoglobulin AND vaccine.
Common trapTrap: heavily contaminated wounds stay open under wet sterile dressings; check closed wounds every 2 days.
Q9What SpO2 is normal, and when can the oximeter lie?
Answer95–100% normal; 88–95% can be acceptable in chronic lung disease.
Common trapTrap: carbon monoxide poisoning gives a falsely normal reading; a low perfusion index (cold finger) = weak signal → reposition and retry.
Q10How do you take a manual blood pressure?
AnswerSeated and rested 5 min, arm at heart level, cuff ~2 cm above the elbow crease; inflate 20–30 mmHg past the point the radial pulse disappears; deflate 2–3 mmHg/s. First sound = systolic, sound disappears = diastolic.
Common trapTrap: always use the same arm — left and right can differ by up to 20 mmHg.
Q11How do you get a reliable finger-prick glucose and urine dipstick result?
AnswerGlucose: wash hands in warm water, prick the side of the fingertip, wipe the first drop, test the second; normal ≈ 70–140 mg/dL. Urine: mid-stream, dip 1–2 s, read at the time on the tube (30–120 s).
Common trapTrap: reading the strip too early or too late gives false results; nitrites + protein = infection.
Q12What are the WHO five keys to safer food, and when do you NOT fly the Q flag?
AnswerKeep clean · separate raw and cooked · cook thoroughly · store at safe temperatures · use safe water and raw materials.
Common trapTrap: the Q flag means “healthy, ready for clearance” — never raise it with an infectious disease on board.
📚 Resources
Books
- The Ship Captain’s Medical Guide — Maritime and Coastguard Agency, 24th edition (2024): wound care, hygiene, and the lidocaine dose to check
Regulations
- MSN 1905 (M+F) Amendment 5 — ships’ medical stores — the dressings, sutures, antiseptics and test kits UK ships must carry
- Prevention of Pollution by Sewage from Ships — IMO, MARPOL Annex IV
Official sites
- Tetanus — NHS
- Blood pressure test — NHS
- Five keys to safer food manual — World Health Organization
- Geeky Medics — free OSCE guides and videos on the simple interrupted suture and blood pressure measurement (search “Geeky Medics”)
Exam focus — MCA
Typical questions: “A deckhand has a 4 cm cut on the forearm from a knife — talk me through your assessment and treatment.” · “Which wounds would you not close on board, and why?” · “How long after injury can you still suture?” · “What about tetanus and antibiotics?” · “Show me how you take a manual blood pressure — and what can make a pulse oximeter reading wrong?”
What examiners want: DR BBCFS – ABCDE first; Look · Feel · Move with sensation, movement and circulation checked before and after; the 12-hour rule and the not-suitable list (bites never closed); cleaning with saline, never hydrogen peroxide or strong iodine; 1% lidocaine without adrenaline, simple interrupted sutures from the centre; antibiotics only for high-risk wounds, immunoglobulin + vaccine for a dirty wound; a correct BP technique (first sound systolic, same arm); SpO2 95–100% and the CO trap; and radio medical advice whenever in doubt.