Fractures, Splints and Spinal Injuries
MedicalHow to recognise and manage fractures, dislocations and spinal injuries on board: blood loss, open fractures, splints, the femur traction splint, the cervical collar, log-roll, stretchers and helicopter hi-line. Good immobilisation limits pain, bleeding and paralysis until evacuation, and it is core MCA medical care exam material.
Last reviewed 1 Nov 2026 · From a professional captain's years of study notes · Organised with AI and checked against current regulations · How we write
On this page (13)
Recognising Fractures and Their Dangers
In short: a fracture is open or closed, but both can bleed. Check the limb beyond the break every time you handle it, and watch for big hidden blood loss and compartment syndrome.
Open and closed fractures
- Open fracture: the bone breaks through the skin → external bleeding and a high infection risk.
- Closed fracture: the skin is intact — but internal bleeding is still possible.
- Before any handling, check feeling, movement and CIRCULATION beyond the injury — and check again after any immobilisation.
- Ice (never directly on the skin) for pain, swelling and bruising.
Blood loss — the real killer
Pelvic or hip fracture → up to 50% blood loss in 10 min. Femur fracture → up to 30% blood loss in 10 min.
- IV fluids are rarely needed for fractures — only for the big pockets that hold a lot of blood: femur and pelvis.
- Trend the blood pressure: BP keeps falling → look for an internal bleed; BP keeps rising → think head injury.
Compartment syndrome
- A fracture may damage blood vessels, or blood from the broken bone builds pressure inside the muscle compartment to dangerous levels.
- Rising pressure → less blood flow → nerves and muscle starve of oxygen and nourishment. It is painful.
- The swelling exceeds what the skin can stretch to — the same happens with circumferential burns. The leg goes cold before it goes blue.
- CHECK CIRCULATION BELOW THE INJURY. Traction needed? → ask TMAS.
Pain relief and ongoing care
- NSAIDs are usually avoided in fractures — they can slow bone healing. For a femur: a small dose of morphine first, then step down. Agree drugs with TMAS.
- Ongoing care (SCMG): wedge the casualty comfortably in a bunk where the wounds can be examined · keep up pain relief (more when moving) · elevate the injured limb · watch swelling and distal perfusion · encourage movement as soon as pain allows.
Open Fracture Management
In short: treat the bleed before the bone, wash the wound, cover it moist and sterile, splint it, and start antibiotics straight away.
Step by step
- Approach: DR BBCFS (Danger, Response, Breathing, Bleeding/Burns, Consciousness, Fractures, Shock) → ABCDE. Bleeding first: “a bone won’t kill you, a bleed will” — stop the haemorrhage → protect → immobilise.
- Control the bleeding: direct pressure · elevation · splinting. Not enough → wound packing and/or indirect pressure at arterial points, or a tourniquet.
- Fluid resuscitation if the BP is low because of bleeding.
- Pain relief.
- Remove obvious contamination and irrigate thoroughly with saline — especially dirty wounds (engine room: grease, oil). A bone infection takes weeks to months to treat.
- Cover with a moist sterile dressing.
- Reduce only if the circulation is compromised — otherwise immobilise as found. Realigning takes 3 people: one holds above the break, one pulls and realigns below it, one splints. Check circulation before and after.
- Splint the fracture.
- Antibiotics immediately — by mouth is fine if the casualty can swallow (in the bloodstream within 2–3 h) — plus tetanus cover.
- Radio medical advice.
Tetanus — who needs a dose?
- Last booster more than 5 years ago → give prophylaxis.
- Booster within the last month → not needed.
- In doubt → ask the doctor (TMAS).
Dislocations and Specific Limb Injuries
In short: a dislocation is a joint forced out of place. You leave it for hospital unless the limb below is losing its blood or nerve supply and help is far away — then the SCMG methods apply.
Dislocation — the rule
- Dislocation = the joint surfaces are forced out of their normal position.
- Do NOT reduce it yourself as a rule — it is a hospital job.
- Exception: offshore, far from hospital → the Ship Captain’s Medical Guide (SCMG p.104) explains how to reduce it.
Shoulder dislocation (SCMG p.104)
- Cause: moderate force — fall on the outstretched arm or shoulder, blow to the upper arm. Less force if it has dislocated before. The humerus usually goes to the front (anteriorly).
- Signs: severe pain · restricted arm movement · “squared” shoulder · loss of blood/nerve supply to the arm (pulses, skin perfusion) · crepitus on movement (possible fracture-dislocation).
- Treatment: pain relief · attempt reduction only if blood/nerve supply is reduced (contact TMAS) · support in a broad arm sling · contact TMAS and prepare to evacuate.
- ⚠️ No reduction if there is crepitus — grating bones mean a possible fracture.
Reducing a shoulder (SCMG p.245)
Rules for any method: pain increases a lot → reconsider · check blood and nerve supply below the injury · apply the splint before releasing traction · afterwards recheck pulses, skin perfusion and light-touch sensation at frequent intervals until evacuated · stop if you feel bone grating, then sling.
- Method 1: casualty on the back · hold the arm at the wrist · lift it vertically, gently and slowly · apply traction · keep traction and rotate the arm outwards · if difficult: feel the head of the humerus in the armpit and push it gently towards the socket while keeping traction.
- Method 2 (hanging arm): casualty face down on the galley table or a bunk, arm hanging over the edge · tie a 2–4 kg weight to the arm · the muscles relax → traction → reduction; it may take more than 30 min · then a broad arm sling.
- Method 2 is the safer choice at sea: give pain relief (low-dose morphine or tramadol), let the arm hang; the muscles relax over 30 min to hours and the joint slips back gently. Method 1 risks nerve damage and needs a stable boat.
- No-weight variant (SCMG 22nd ed.): morphine 15 mg IM → casualty prone, arm hanging free for about 1 h (it often reduces by itself) → then a collar-and-cuff sling for up to 48 h.
Humerus, forearm and wrist (SCMG p.104, p.245)
- Cause: a fall onto the outstretched hand or elbow.
- Signs: deformity · bruising/swelling · crepitus · loss of movement · open wounds · loss of distal pulses.
- Treatment: pain relief · direct pressure on bleeding · clean and cover wounds · reduce and splint · collar-and-cuff sling · antibiotics if there is an open wound.
- Humerus (SCMG p.245): realign by hand only if perfusion or nerve supply is reduced compared with the other side. A collar-and-cuff with the wrist high lets the elbow hang, so gravity reduces the fracture. Rough sea → add a body bandage.
Elbow fracture or dislocation (SCMG p.105)
- Needs considerable force and often comes with a fracture. Vessels and nerves run close to the joint → high risk of damage.
- Signs: pain in the elbow and lower arm · deformity · loss of movement · loss of distal pulses, perfusion or nerve supply.
- Treatment: pain relief · reduce only if blood/nerve supply is reduced · broad arm sling.
Femur fracture (SCMG p.105)
- Needs substantial force: fall from height, washed along the deck, crushed between vessels — expect other injuries.
- Signs: severe pain · shock · thigh deformity (shortened and thicker) · loss of movement · cannot stand · loss of blood/nerve supply to the lower leg.
- Treatment: direct compression on bleeding · treat shock with fluids · pain relief · traction splint (the best way to stabilise it and cut internal bleeding and pain) · antibiotics for open wounds · contact TMAS and prepare an urgent evacuation.
Knee and kneecap (SCMG p.105–106)
- Common on board, usually ligament or meniscus. The kneecap (patella) may dislocate to the outside or break from a direct blow or sudden bending.
- Immediate large swelling + deformity → think distal femur fracture or knee dislocation (major force) → contact TMAS.
- Signs: pain · swelling around the knee · cannot raise the straight leg · kneecap dislocation: deformity on the outer side, leg held slightly bent.
- Kneecap fracture: full-leg splint, knee slightly bent · evacuate urgently.
- Kneecap dislocation: straighten the leg and push the kneecap firmly back with your thumbs · then support with a crepe/elastic bandage.
Lower leg — tibia (SCMG p.106)
- Fairly common on board: falls from height or down stairs, swept along the deck. A displaced fracture is often open.
- Badly displaced → swelling can cut off blood and nerve supply below → urgent evacuation.
- Signs: pain at the site · deformity · swelling (the calf can become very tense over hours or days) · crepitus · loss of distal pulses · reduced sensation · cannot bear weight.
- Treatment: pain relief · pressure on bleeding · clean and cover wounds · reduce and splint (a traction splint may help) · antibiotics if open · elevate the leg · evacuate urgently if open and displaced or badly swollen.
Splints, Slings and Lower-Limb Splinting
In short: a splint holds the bone still so it hurts and bleeds less. Cover the joint above and below, pad it, and check the circulation before and after.
Splint types
- SAM splint: a mouldable splint — aluminium core between foam layers. Floppy when flat, rigid once folded. Cut it to size; used on its own, fold a lengthwise V down the centre and it becomes stiff enough to splint.
- Inflatable splint: closed fractures only · covers one joint below and one above · talcum powder helps it slide on · don’t over-inflate · check distal circulation through the opening.
- Improvised: a rolled magazine makes a forearm splint.
Arm: slings and forearm splints (EFA manual V1.3)
- Forearm fracture in a sling: keep the hand about 10 cm higher than the elbow.
- Forearm splint length: from beyond the elbow to mid-fingers.
- Collar-and-cuff sling for humerus, forearm and wrist fractures; broad arm sling for shoulder and elbow injuries (SCMG).
Pelvis, hip, thigh and lower leg — splinting steps
- Check the circulation below the suspected fracture — if OK, carry on.
- Immobilise.
- Put padding on the good leg.
- Bring the good leg to the injured one — never the other way round.
- Figure-of-eight bandage round the ankles and feet.
- Broad-fold bandages and a pelvic brace.
- Re-check the circulation after splinting.
- Displaced femur → traction splint (next section).
- Pelvic fracture: see Bleeding, Shock and IV Fluids for the pelvic binder and why a traction splint is not used there.
The Femur Traction Splint
In short: a traction splint pulls the broken ends of the femur apart and back into line. The muscle stops spasming, so the casualty has less pain and bleeds less.
Applying it
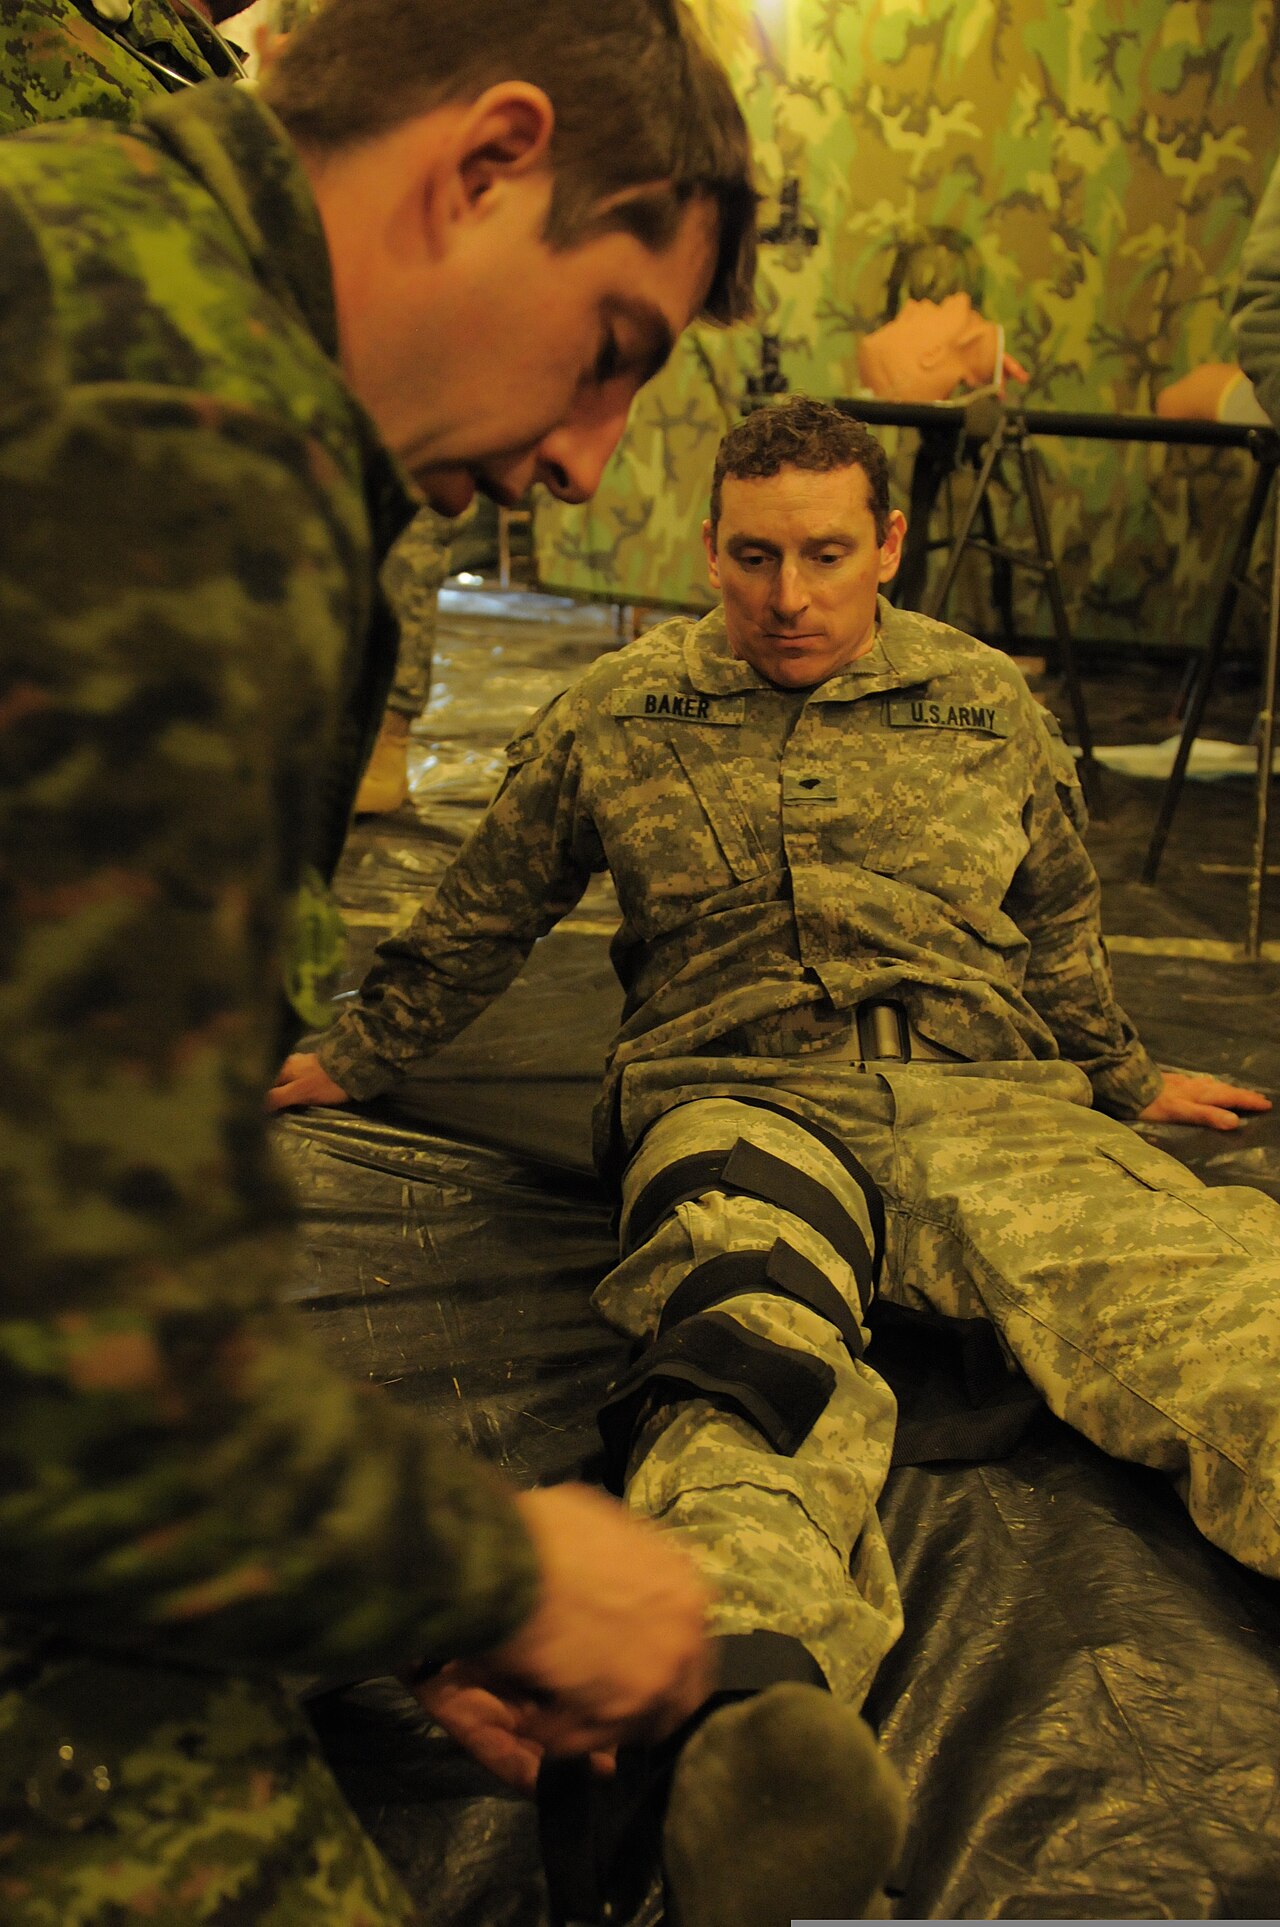
- Use a traction splint (e.g. Sager-type) for a fractured femur.
- Take off the shoe and sock first and pad the pressure points (a towel) — the splint stays on for hours.
- Check feeling, movement and circulation BEFORE applying it, as for any immobilisation.
- Seat the splint against the pubic bone (mind the genitals). Put the ankle hitch under the foot, bar in line with the ankle. Both femurs broken → place it alongside the worst one.
- Apply traction: about 10% of body weight (70 kg → 7 kg) — in practice, pull until the pain eases.
- Tie the feet in a figure-of-eight (ankles and round the feet). A spare strap can make an improvised pelvic belt — an unstable pelvis can tear the femoral arteries.
- Re-check feeling, movement and circulation AFTER.
- Watch for compartment syndrome: the leg goes cold before blue.
Know your own splint
- The old Thomas splint had a ring that caused pressure sores.
- The Kendrick type is a compact version suited to yachts.
- Models differ: train with the splint you actually carry on board.
Cervical Spine Injury: When to Suspect
In short: suspect a neck injury from the mechanism, not just from pain. A cervical injury can stop breathing at once, so protect the neck from the first second.
Suspect a cervical spine injury if
- High-risk factors + neck pain, OR
- a visible injury above the clavicle, OR
- a thoracic inlet injury with NO pain, OR
- midline tenderness over the spine.
High-risk factors
- Fall over 1 m or over 5 steps. A simpler working rule you will also hear: suspect the spine in any fall over 2 m. Keep both — the lower threshold is the safer one.
- Axial load to the head (diving injury).
- High-speed motor vehicle accident.
- Accident with a motorised recreational vehicle (jet ski).
- Age over 65.
- Injured more than 48 h ago and still complaining of symptoms.
- Previous disease of the spine (arthritis, previous surgery).
Warning signs and first checks
- ⚡ A cervical injury can stop breathing immediately.
- Priapism (an erection in a male casualty) points to a spinal cord injury at that level.
- Motor check — the knee-hold test: lift the casualty’s knee; if they can keep the knee up, that is a good sign.
- Vomiting is very common with spinal damage → airway risk → roll them as one unit, supporting the head and neck with your hand, then back again.
- Spinal casualties lie on the back, not on the side. Unconscious → oropharyngeal (Guedel) airway and keep supine.
- Approach from behind (from the top of the head), not from the side.
- Rough sea: hold the neck still with your hands on the shoulders and forearms blocking the head.
Never ask “can you feel your legs?” — the casualty may panic and move. Use the knee-hold test instead.
Cervical Collar, Spine Board and Log-Roll
In short: neutral head, right-size collar, then full immobilisation on a board. A collar on its own does not protect the neck.
Fitting the collar
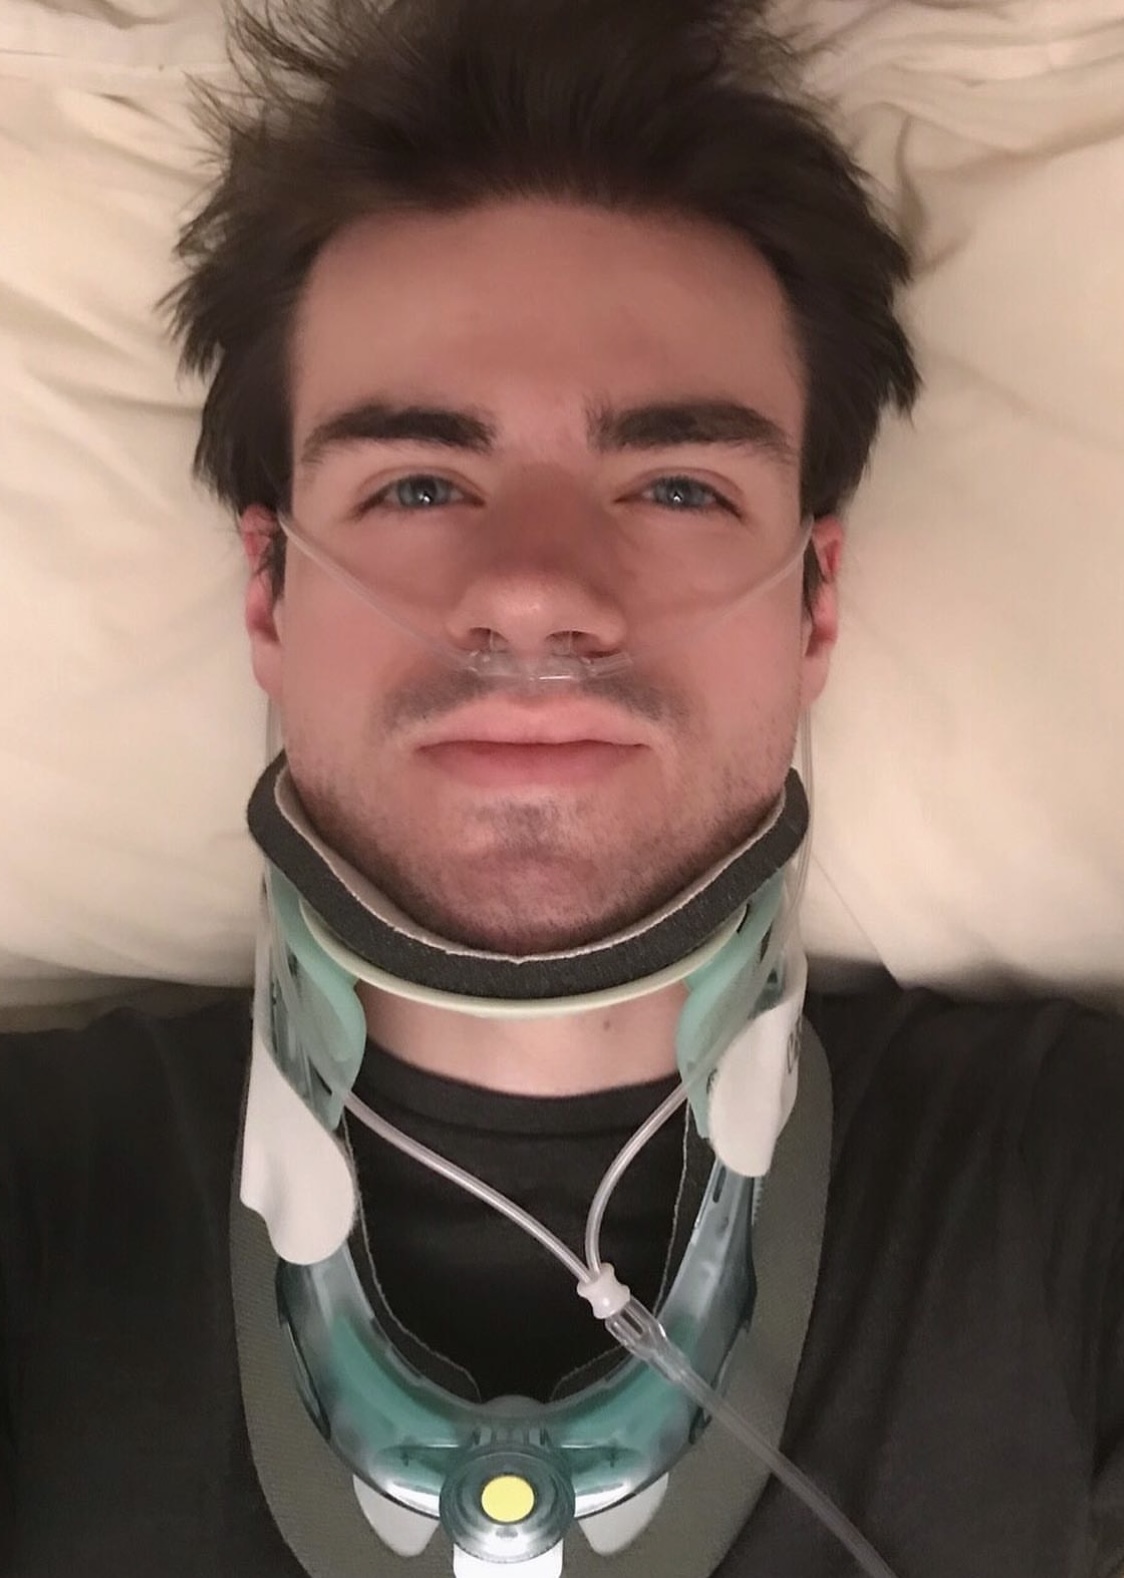
- Bring the head into a neutral position BEFORE fitting the collar. Do everything slowly and with great care.
- Size it right: too short → no support, the chin drops in · too tall → the neck is over-extended. Correct: the chin rests on the chin piece, head neutral.
- Adjustable collar: red dot centred, click-lock the size. Sizing tab sticking out = too small, pushed deep in = too large. Front piece in line with the sternum.
- Fit check: ask “Can you breathe? Can you swallow?” — yes to both, the collar stays.
- A collar alone will NOT immobilise the neck: never transport the casualty sitting up, never let them walk, and use 3 people to lay them down and support them.
Spine board and log-roll
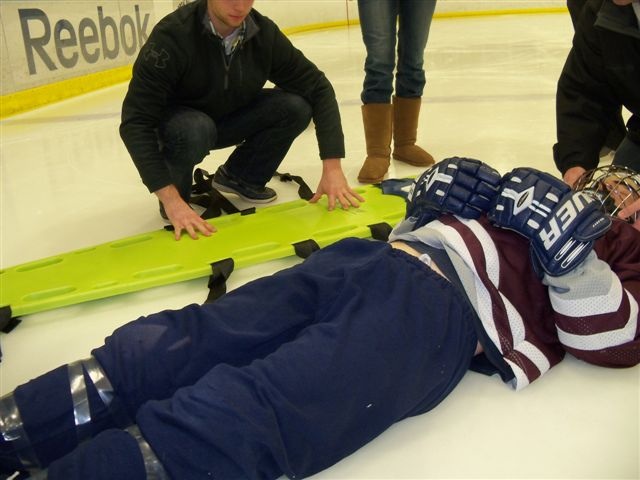
- Head blocks + straps on a spine board: a block each side of the head, straps across the forehead and chin area → head locked in neutral.
- Strapping order: chest strap FIRST, head blocks LAST. Say “breathe in, hold” before tightening the chest strap.
- The person holding the head never lets go until the casualty is fully immobilised.
- Log-roll only while someone holds and supports the neck.
When NOT to use a cervical collar
- No gag reflex
- Fractured jaw
- Airway obstruction or breathing difficulties
- Collarbone (clavicle) fractures
- Uncooperative casualty
- Severe head injury — the collar presses on the neck and raises the pressure inside the skull
- Seizures · anaphylaxis · tracheal deviation
- Burns or injury to the neck
- Crash helmet still on
- Untrained rescuer
Spinal Ongoing Care, Lifting and Stretchers
In short: a spinal casualty may wait days for evacuation. Keep them flat, turn them often, protect the skin, and move them only as one straight unit.
Nursing care
- Keep flat on a hard surface.
- Prevent pressure ulcers: turn the casualty every hour and cushion the pressure points.
- Pressure points — lying on the back: heels, tailbone, elbows, shoulders, back of the head · lying on the side: ankle, knee, hip, shoulder, ear.
- Pain relief.
- Paralysis develops → support the paralysed limbs and body.
- Lost sphincter control → keep the casualty clean of urine and faeces.
- Any wounds → early wound care.
- Radio medical advice.
Lifting without bending the spine
- Blanket lift: secure the casualty (arms and legs tied), lay a rolled blanket alongside, then roll it tight on both sides against them — the rolls become grip handles.
- The lift: 6 rescuers — 2 each side on the rolls, 1 at the head, 1 at the feet → lift together, keeping the casualty flat (spine in line).
- Two-person lift (sitting casualty, no spinal injury): one rescuer kneels behind, arms round the chest gripping the casualty’s crossed forearms; the other crouches at the side with arms under the thighs/knees → lift together on command.
- Improvised stretcher: a blanket folded round two poles — the casualty’s weight locks the folds.
Lift with care: KEEP YOUR BACK STRAIGHT. Never try to lift someone too heavy for you.
Stretcher types
| Stretcher | What it is | Best for |
|---|---|---|
| Basket | Rigid shell that protects the casualty | Hoisting and transfers — helicopter, ship-to-ship |
| Vacuum | Moulds round the body when the air is sucked out | Whole-body immobilisation |
| Neil-Robertson | Canvas with wooden slats that wraps the casualty | Vertical hoisting through narrow ship spaces |
Neil-Robertson: tie ALL the straps. Miss one and the casualty can slip out during a vertical hoist.
Helicopter Hi-Line Transfer
In short: prepare a clear deck and a steady helm, follow the helicopter crew’s brief, and never tie the hi-line to the vessel.
Preparing the vessel
- Stow all loose items (ropes, buckets…) and make sure the sails are secure.
- Arrange a bucket or a clear area for the hi-line.
- Put your best helm on the wheel.
- Wind about 30° on the port bow, deck clear, contact on Ch 16 (IAMSAR Vol. III).
- The helicopter dictates course and approach — not you. Listen to the crew’s hi-line brief.
During the transfer
- VHF manned but NOT used during winching unless the helicopter crew tells you to.
- Hold the hi-line by hand — NEVER make it fast to the vessel.
- Let the wire touch the water or deck first to discharge static electricity.
- The hi-line has a weighted end (about 20–30 lb).
- Full procedure: IAMSAR Vol. III.
Reporting a Serious Injury
In short: a fracture or dislocation on board is not only a medical problem — it is a reportable marine casualty.
- MGN 564 (M+F) sets out what to report to the MAIB. A Malta-flag vessel reports to the MSIU.
- Reportable events include collision, grounding, pollution, fire and a serious injury.
- Serious injury covers: fracture · dislocation · incapacity for work for more than 3 days · loss of sight · hypothermia · hospital stay over 24 h.
- Write up the casualty’s care in the medical report too — see Emergency Response, Radio Medical Advice and Medical Records.
⚡ Flashcards
Test yourself, one card at a timeQ1Open or closed fracture: what is the difference, and what do you check before you touch it?
AnswerOpen = bone through the skin → bleeding + high infection risk. Closed = skin intact, but it can still bleed inside. Check feeling, movement, circulation before AND after any immobilisation.
Common trapTrap: “closed” does not mean “safe”.
Q2Which fractures can kill by blood loss, and how fast?
AnswerPelvis/hip: up to 50% of blood volume in 10 min · femur: up to 30% in 10 min. Treat for shock early.
Common trapTrap: swelling can build into compartment syndrome — the limb goes cold before blue. Always check circulation below the injury.
Q3Open fracture: what comes first, and which drugs?
AnswerBleeding first (“a bone won’t kill you, a bleed will”) → irrigate with saline → moist sterile dressing → splint → antibiotics at once + tetanus check → TMAS.
Common trapTrap: don’t realign it unless the circulation is compromised.
Q4Shoulder dislocation offshore: do you put it back?
AnswerNormally no — hospital job. Far from help: only if blood/nerve supply below is reduced, with TMAS (SCMG p.104, p.245). Otherwise broad arm sling and prepare to evacuate.
Common trapTrap: never reduce with crepitus (bone grating) — possible fracture-dislocation.
Q5How do you splint a broken leg, and what are the rules for an inflatable splint?
AnswerPad, bring the good leg to the injured one, figure-of-eight at the ankles/feet, broad folds, re-check circulation. Inflatable: closed fractures only, one joint above + one below, don’t over-inflate.
Common trapTrap: never move the injured leg to the good one.
Q6Femur traction splint: why use it, and how hard do you pull?
AnswerRealigns the bone → less spasm = less pain + less bleeding. Traction about 10% of body weight (70 kg → 7 kg) — in practice pull until the pain eases. Both femurs broken → splint alongside the worst one.
Common trapTrap: forgetting feeling, movement, circulation before and after.
Q7When do you suspect a cervical spine injury?
AnswerHigh-risk mechanism + neck pain · injury above the clavicle · thoracic inlet injury with no pain · midline tenderness. High risk: fall over 1 m or 5 steps (another working rule: over 2 m), diving, high-speed crash, jet ski, age over 65.
Common trapTrap: never ask “can you feel your legs?” — use the knee-hold test.
Q8Cervical collar: how do you fit it, and when must you not?
AnswerHead neutral first, right size, then ask “can you breathe? can you swallow?” A collar alone does not immobilise: 3 people lay the casualty down; never sit up, never walk.
Common trapTrap: no collar with no gag reflex, severe head injury, airway obstruction, fractured jaw, seizures…
Q9How do you nurse a spinal casualty for days on board?
AnswerFlat on a hard surface, on the back; turn every hour and pad pressure points (heels, tailbone, elbows, shoulders, back of head); pain relief; clean if incontinent; TMAS.
Common trapTrap: vomiting is common — roll as one unit with the head and neck supported.
Q10Which stretcher for which job, and how many people for a blanket lift?
AnswerBasket: hoisting and transfers · vacuum: whole-body immobilisation · Neil-Robertson: vertical lifts through narrow spaces. Blanket lift: 6 rescuers, spine kept flat.
Common trapTrap: Neil-Robertson — tie every strap or the casualty can slip out.
Q11Helicopter hi-line: what do you do with the line and the VHF?
AnswerHold the hi-line by hand, never make it fast; let the wire touch water or deck first (static). VHF manned but not used during winching unless the crew asks.
Common trapTrap: you don’t choose the approach — the helicopter dictates course and approach.
Q12A crew member breaks a leg on board: is it a reportable accident?
AnswerYes. A fracture or dislocation is a serious injury under MGN 564 (M+F), like incapacity over 3 days, loss of sight, hypothermia or hospital over 24 h. Report to the MAIB (Malta flag: MSIU).
Common trapTrap: thinking only collisions, groundings, pollution and fires are reported.
📚 Resources
Video
- What To Do If Someone Has A Spinal Cord Injury - First Aid Training - St John Ambulance — St John Ambulance
Books
- The Ship Captain’s Medical Guide — Maritime and Coastguard Agency, 24th edition (2024): fractures, dislocations and reduction methods
- International Medical Guide for Ships — World Health Organization, 3rd edition
Regulations
- MIN 718 (M+F) The ship captain’s medical guide 24th edition — MCA notice introducing the current SCMG
- Marine Guidance Note 564 (M+F) Amendment 2 — marine casualty and incident reporting to the MAIB
- IAMSAR Vol. III — helicopter operations and hi-line transfer
Official sites
- Broken Bones and Fractures — St John Ambulance
- Spinal Injury First Aid — St John Ambulance
Exam focus — MCA
Typical questions: “A deckhand falls 3 m into the hold and has thigh pain and a deformed leg — talk me through it.” · “How do you manage an open fracture of the lower leg?” · “When would you suspect a neck injury, and how do you fit a collar?” · “A crew member has dislocated a shoulder mid-Atlantic — do you reduce it?” · “How do you prepare the yacht for a helicopter hi-line transfer?”
What examiners want: DR BBCFS → ABCDE with bleeding before bones; feeling, movement, circulation before and after every splint; the blood-loss figures (pelvis 50%, femur 30% in 10 min) and early shock care; the traction splint for a femur (about 10% of body weight, until pain eases); open fracture = saline wash, moist sterile dressing, antibiotics at once, tetanus; reduce a dislocation only if the circulation or nerves are compromised, with TMAS, and never with crepitus; C-spine suspicion criteria, neutral head before the collar, collar contra-indications, 3 people to lay down and a proper log-roll; spinal nursing (turn hourly, pressure points); hi-line held by hand, never made fast, earthed on the water or deck first; and that a fracture is a reportable serious injury (MGN 564).