Lateral Marks and Preferred Channel
NavigationPort and starboard lateral marks in IALA Regions A and B, and the preferred channel marks used where a channel splits: colour, shape, topmark and light. Reading them right keeps the ship inside the buoyed channel, and they are a standard MCA oral question.
Last reviewed 1 Nov 2026 · From a professional captain's years of study notes · Organised with AI and checked against current regulations · How we write
On this page (8)
What lateral marks do and the direction of buoyage
In short: lateral marks are the edges of the road. They only make sense once you know which way the road runs.
Read first: IALA Buoyage System and Light Characters (regions, direction of buoyage, light abbreviations). This is the second topic of the Buoyage area.
- Lateral marks show the port and starboard sides of a well-defined channel or route (IALA R1001).
- Port and starboard are named as seen by a ship going with the direction of buoyage.
- Direction of buoyage: from seaward into a harbour, river or estuary. Elsewhere set by the authority, generally clockwise round land masses. Where in doubt, the chart shows it with a magenta arrow.
- Lateral marks can be buoys or fixed beacons. They may also mark a single obstruction outside the channel; keep to the side the mark tells you (33 CFR 62.25).
- They may carry numbers or letters that match the chart — a quick check of where you are in a long channel.
- On the bridge: outbound, you are going against the buoyage. In Region A the red marks are now on your starboard hand. Say it aloud in the pilotage briefing so the whole bridge team has the same picture.
Port and starboard marks in Region A and Region B
In short: shapes never change; colours swap between regions. Region A (Europe incl. Malta and the UK, Africa, Australia, most of Asia): red to port entering. Region B (the Americas, Japan, South Korea, the Philippines): red to starboard entering.
| Port-hand mark | Starboard-hand mark | |
|---|---|---|
| Shape | Can (cylinder), pillar or spar | Cone, pillar or spar |
| Topmark (if fitted) | One can | One cone, point up |
| Colour — Region A | Red | Green |
| Colour — Region B | Green | Red |
| Light | Colour of the mark, any rhythm except Fl(2+1) | Colour of the mark, any rhythm except Fl(2+1) |
| Purpose | Port (left) side of the channel entering from sea | Starboard (right) side of the channel entering from sea |
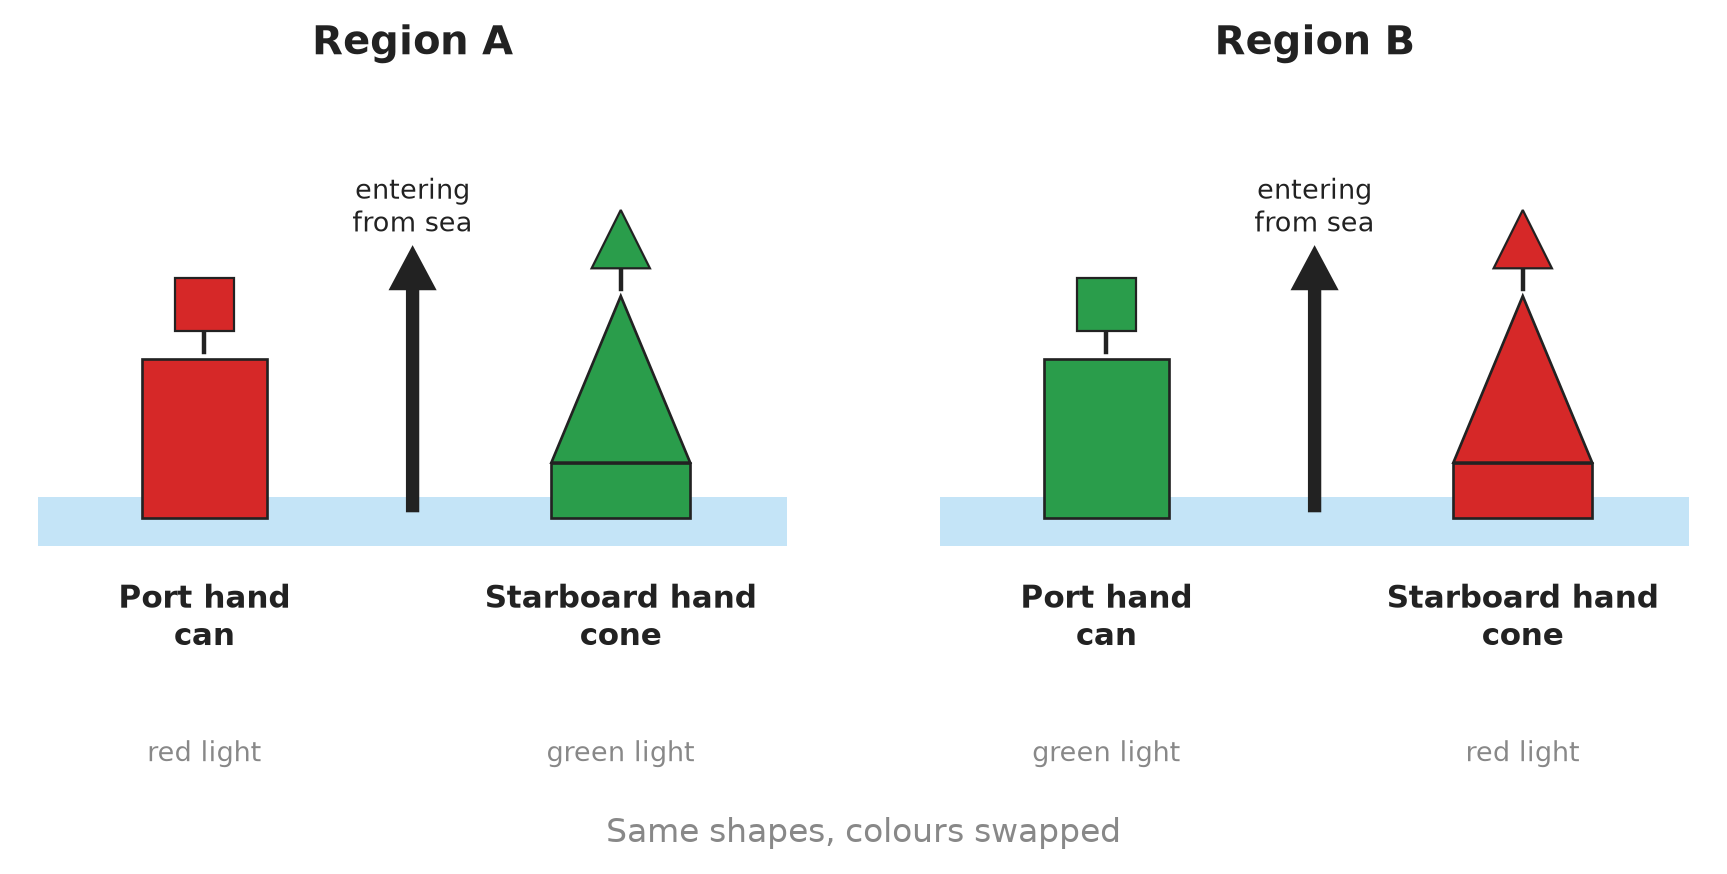
- Memory hooks: Region A — “Is there any red port left?” (red to port entering). Region B — “Red Right Returning”.
- Black for green: where an authority finds green unsuitable for a buoy, it may exceptionally use black instead (Canadian Chart 1, Section Q).
- On the bridge: a yacht crossing from the Med to the Caribbean or Florida changes region. Brief the bridge team before landfall: from now on, red marks are left to starboard when entering.
Why shape and topmark matter
- Colour is not always easy to read: low sun behind the buoy, dusk, haze, or a red-green colour-blind watchkeeper.
- The shape gives the side without the colour: can = port, cone = starboard, in both regions.
- A pillar or spar buoy has no telling shape. Then you rely on the colour, the topmark (can or cone) and, at night, the light colour.
- The system is built so a mark can still be identified if its light fails or its topmark is lost.
Lateral lights
In short: the light is the colour of the mark. The rhythm is free, except for one: Fl(2+1).
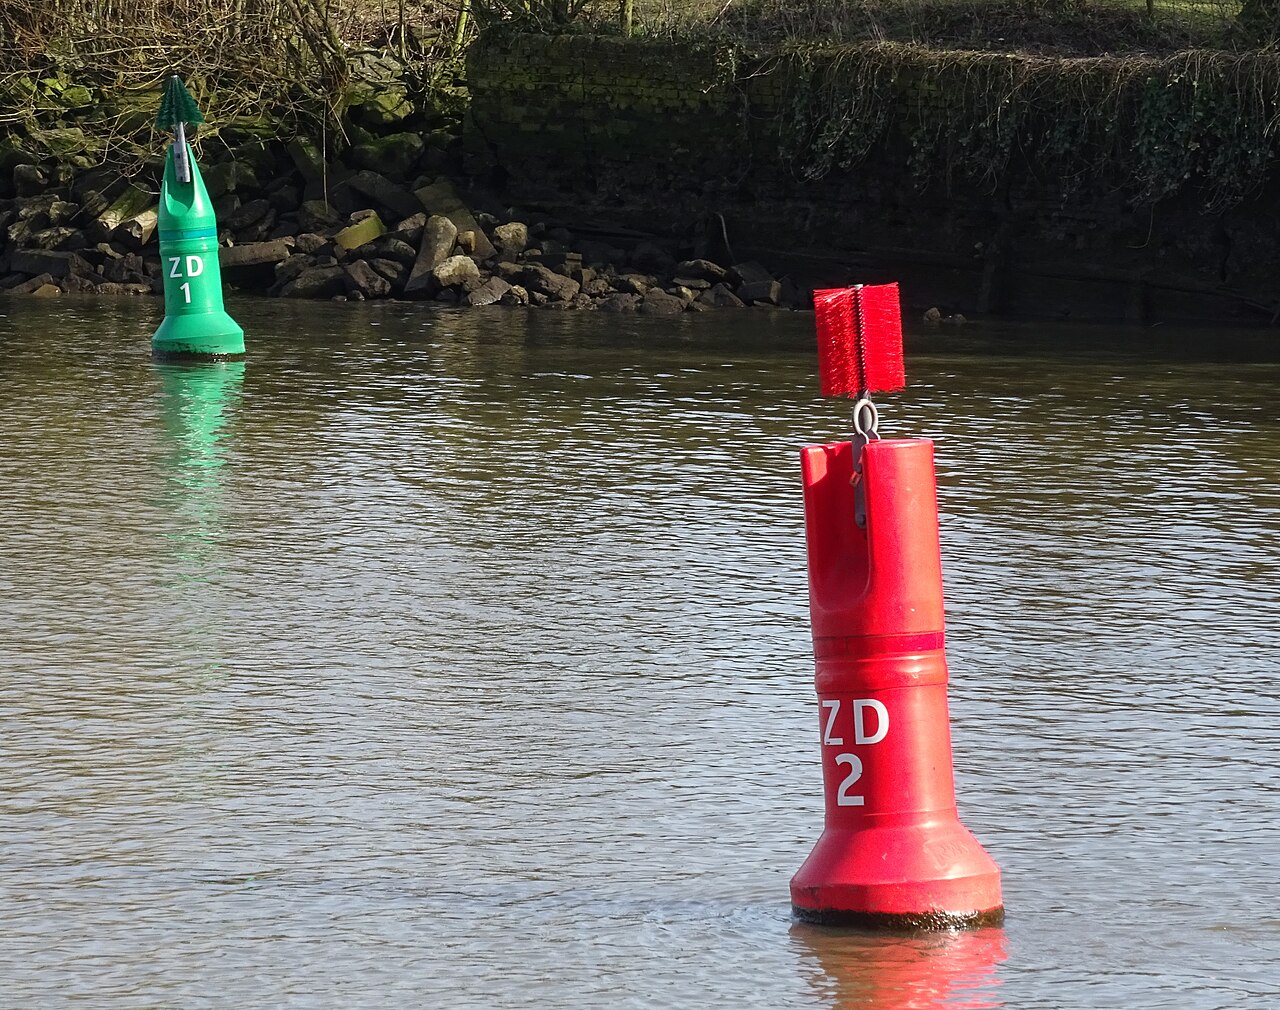
- Colour: red on a red mark, green on a green mark. So in Region A a red light is a port-hand mark entering; in Region B it is a starboard-hand mark.
- Rhythm: continuous or flashing — any rhythm except composite group flashing (2+1) (IALA R1001). Typical chart examples: Fl R 5s, Fl(2) G 6s, Q G.
- Fl(2+1) is kept for preferred channel marks, so you can tell a split in the channel at night.
- On the bridge at night: colour first, then count the flashes and time the period with a stopwatch. Compare with the chart only after that.
Preferred channel marks
In short: where a channel divides, a modified lateral mark tells you which branch is preferred. Read the main colour and shape as a normal lateral mark for the preferred channel; the broad band is for the secondary channel.
| Preferred channel to starboard | Preferred channel to port | |
|---|---|---|
| Acts as (following preferred channel) | Port-hand mark | Starboard-hand mark |
| Shape | Can, pillar or spar | Cone, pillar or spar |
| Topmark (if fitted) | One can | One cone, point up |
| Colour — Region A | Red with one broad green band (RGR) | Green with one broad red band (GRG) |
| Colour — Region B | Green with one broad red band | Red with one broad green band |
| Light | Fl(2+1), colour of the main band (R in A, G in B) | Fl(2+1), colour of the main band (G in A, R in B) |
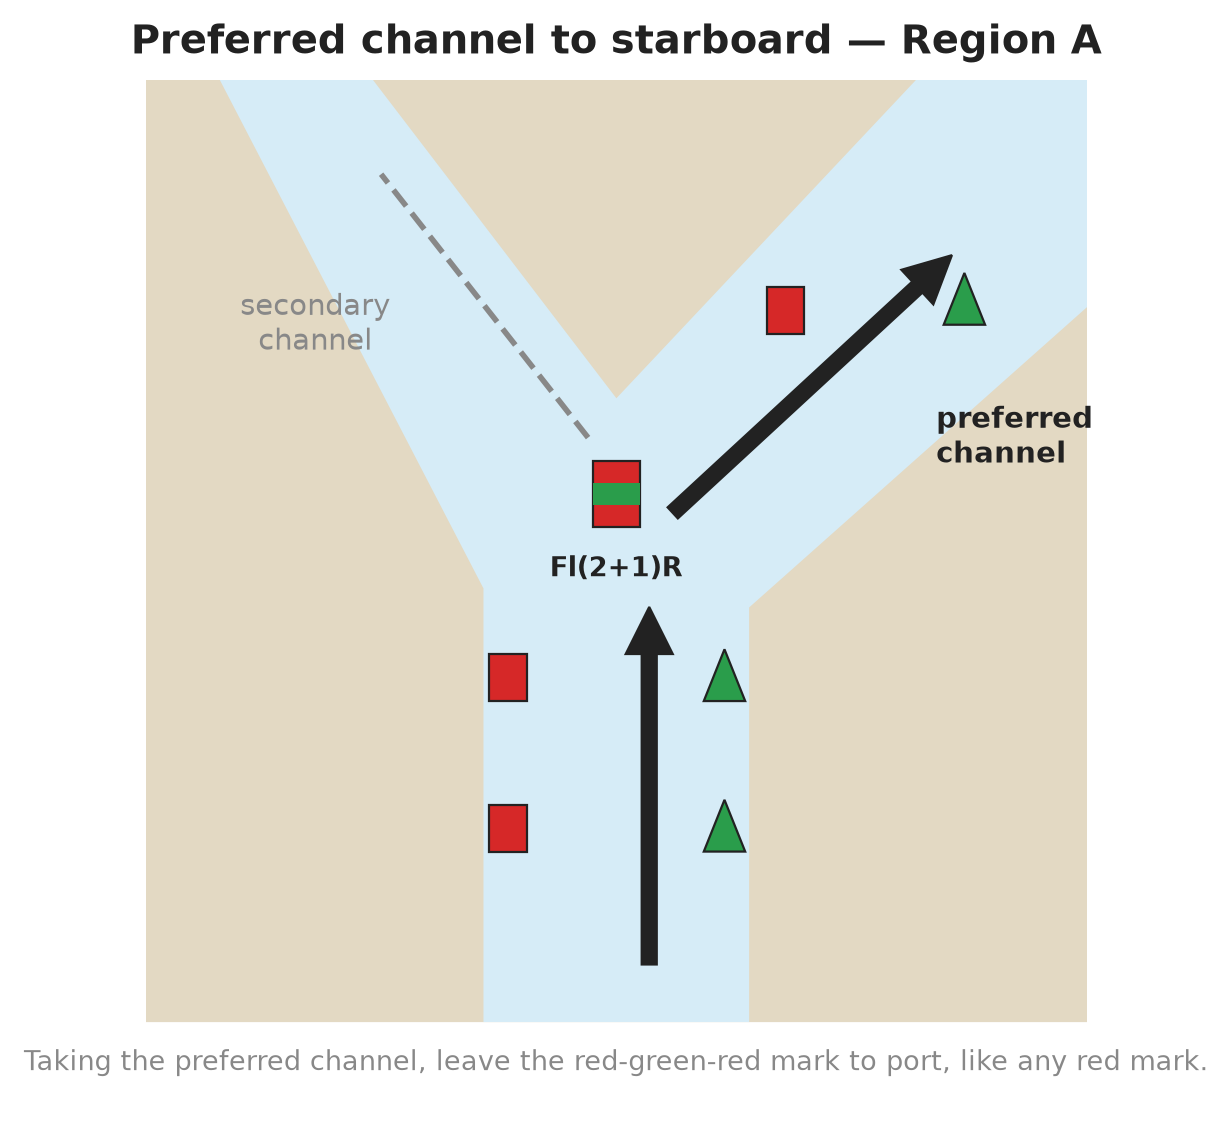
- The rule: the top (main) colour shows the preferred channel side. Taking the preferred channel, treat the mark as the lateral mark of its main colour. Taking the secondary channel, treat it as the mark of the band colour (33 CFR 62.25).
- Example — Region A, entering: red can with a green band ahead, Fl(2+1)R. Preferred channel is to starboard; leave the mark to port. If you want the secondary (left-hand) channel, leave it to starboard as if it were green.
- These marks may also mark a wreck or obstruction that can be passed on either side (33 CFR 62.25).
- Light: Fl(2+1) is the only rhythm they use and the only mark that uses it — the night-time signature of a split channel.
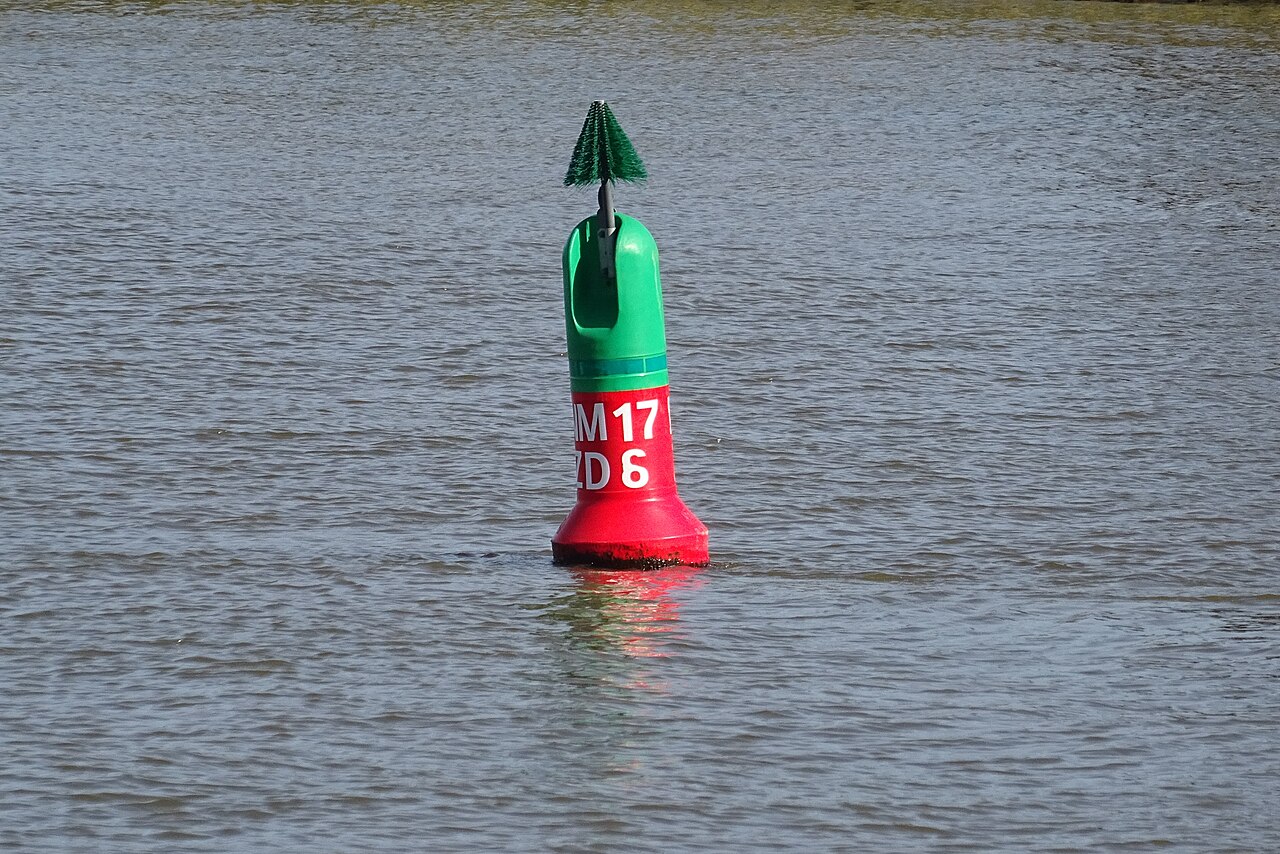
Common trap: reading the band as the main colour. A red buoy with a green band is still a red (port-hand, Region A) mark for the preferred channel. The band only matters if you choose the secondary channel.
Lateral marks on the paper chart and on ECDIS
In short: the MCA syllabus asks you to recognise IALA A and B marks and state their meaning on both a paper chart and an ECDIS. Same mark, different symbol.
Paper chart
- The buoy is drawn in its shape (can, cone, pillar, spar), with any topmark on top.
- Colour letters beside it: R = red, G = green; preferred channel RGR or GRG (read top to bottom).
- A lit buoy has a magenta light flare, with the character written next to it, e.g. “Fl.R.5s” or “Fl(2+1)G.10s”.
- Numbers or letters painted on the buoy are shown next to the symbol.
- The full list of symbols is in the chart key, INT 1 / Chart 1, Section Q (buoys and beacons).
ECDIS
- An ENC shows buoys with paper-chart (traditional) or simplified symbols. The operator chooses; the meaning does not change.
- To read the full light (colour, rhythm, period), pick the object with the cursor.
- Do not assume the region: check the colour on the ENC and the direction of buoyage.
- On the bridge: if what you see on the water does not match the chart or ECDIS (missing buoy, wrong light), slow down, fix the position by other means and check NP735 and the latest Notices to Mariners.
⚡ Flashcards
Test yourself, one card at a timeQ1What do lateral marks show?
AnswerThe port and starboard sides of a channel or route, as seen by a ship going with the direction of buoyage (in from the sea).
Common trapThey do not mark a single danger — that is the job of cardinal and isolated danger marks.
Q2You are leaving harbour in Region A. Which side are the red marks?
AnswerOn your starboard side. Leaving, you go against the direction of buoyage, so everything is reversed.
Common trap“Red to port” only works when entering.
Q3Describe a Region A port-hand mark.
AnswerRed · can, pillar or spar · topmark (if any) one red can · red light, any rhythm except Fl(2+1). Marks the port (left) side of the channel when entering from sea.
Q4Describe a Region A starboard-hand mark.
AnswerGreen · cone, pillar or spar · topmark (if any) one green cone, point up · green light, any rhythm except Fl(2+1). Marks the starboard (right) side when entering from sea.
Q5What changes for lateral marks in Region B?
AnswerOnly the colours, and so the light colours: green to port, red to starboard entering — “Red Right Returning”.
Common trapThe shapes do not change: can to port, cone to starboard in both regions.
Q6Why do shape and topmark matter if you can see the colour?
AnswerColour can be hard to read against the sun, in poor light or for a colour-blind watchkeeper. Can = port, cone = starboard, in both regions.
Common trapA pillar or spar tells you nothing by shape — use colour, topmark and light.
Q7What lights can a lateral mark show?
AnswerThe colour of the mark (red or green), continuous or flashing, any rhythm except Fl(2+1).
Common trapFl(2+1) is reserved for preferred channel marks.
Q8What does a preferred channel mark tell you?
AnswerThe channel splits here. The main colour (and shape, topmark) is the lateral mark for the preferred channel; the band is for the other one. Light: Fl(2+1) in the main colour.
Q9Region A: a red can with one broad green band. What is it?
AnswerPreferred channel to starboard. Following the preferred channel, treat it as a port-hand mark: leave it to port. Light Fl(2+1)R.
Common trapDo not read the band first — the main colour decides.
Q10Region A: a green cone with one broad red band. What is it?
AnswerPreferred channel to port. Following the preferred channel, leave it to starboard. Light Fl(2+1)G. Region B: same shapes, colours reversed.
Q11How do you recognise lateral marks on a paper chart and on ECDIS?
AnswerPaper: can or cone symbol + colour letters (R, G, RGR, GRG) + magenta light flare with the character. ECDIS: paper-chart or simplified symbols; pick the object to read the light.
Common trapNever assume the region — read the colour and the direction of buoyage.
📚 Resources
Videos
- IALA BUOYAGE SYSTEM PART 1, Region A & Region B, LATERAL PORT & STBD HAND MARK — Nizam Khan: Maritime Finance
- IALA Buoyage Region B — Nautical Training 777
Books
- NP735 IALA Maritime Buoyage System — UK Hydrographic Office (ADMIRALTY), 8th edition (2018)
Regulations
- IALA Recommendation R1001 — The IALA Maritime Buoyage System — Edition 2.0 (revised June 2023)
- 33 CFR 62.25 — Lateral marks — US rule (Region B), incl. preferred channel marks
- SOLAS V/13 — establishment and operation of aids to navigation
Official sites
- IALA Maritime Buoyage System — Trinity House (Region A, UK waters)
- Canadian Chart 1 — Section Q, IALA buoyage — Canadian Hydrographic Service (Region B chart symbols)
Exam focus — MCA
Typical questions • “Describe the light sequence of the lateral marks” → colour of the mark (red or green, depending on region), continuous or flashing, any rhythm except Fl(2+1). • “Give a full description of a Region A port-hand mark” → red, can (or pillar/spar), single can topmark, red light, marks the port side entering from sea. • “What changes in Region B?” → colours and light colours reversed; shapes the same. • “What is this mark?” (red can with green band, Fl(2+1)R) → preferred channel to starboard; leave it to port on the preferred channel. • “Identify this mark” on a paper chart or ECDIS screen → name, meaning, region, and which side you pass it. What examiners look for: a fixed order — shape, topmark, colour, light, use — and the link to the direction of buoyage. Say clearly that leaving harbour reverses the sides, and that Fl(2+1) means preferred channel.